Moloch FPC
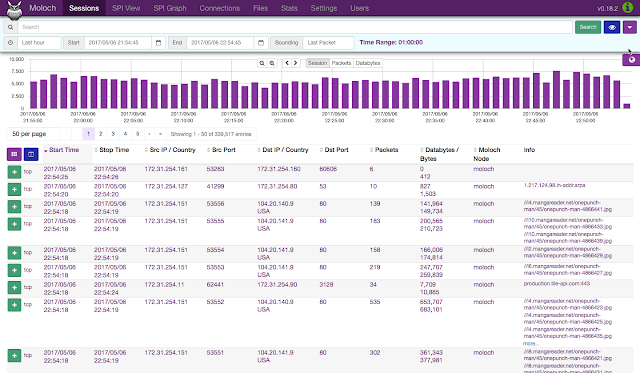
Moloch is an open source project providing full packet capture. It's been around for a while now and has matured to the point where deployment is simple and it pretty much manages itself. Moloch has an amazingly good UI and search is powered by the hugely capable Elasticsearch.
In this post I'm going to run through the installation and configuration on a CentOS 7 VM using the Moloch 0.18.2 RPM available here
Once the disks are sorted, the next task is to install Java. The easiest way is to download the latest the Server JRE from Oracle. The one I used for this build was server-jre-8u131-linux-x64.tar.gz. To install and configure follow these few simple steps.
Once Java is installed it's time to install the Elasticsearch RPM. The recommended one for Moloch 0.18.2 release is Elasticsearch 5.2.2. Follow these steps to install Elasticsearch
Start the service
Follow the rest of the steps to to initialise the Elasticsearch and create the first admin user
Initialise Elasticsearch with the following command:
Schedule the daily.sh script to run during quiet hours using cron.
If you want to change the percentage of disk space that should be available before PCAP files are deleted edit the /data/moloch/etc/config.ini file and set the value you want. The default is 5% and seems to work well for me.
Add a firewall rule to allow remote access to Moloch on 8005 port.
In this post I'm going to run through the installation and configuration on a CentOS 7 VM using the Moloch 0.18.2 RPM available here
Requirements
For a small lab environment such as I have a VM based solution will work just fine. Moloch will scale; more information can be found on the Readme and in the FAQ. I use a SPAN port on a Cisco switch that sends traffic into a virtual switch on VMware allowing any VM Guest with an interface on that vswitch to sniff traffic. I created a VM Guest with the following specification:- CentOS 7 minimal install
- 8 Cores
- 400GB Disk 1
- 100GB Disk 2
- 12GB Ram
- 2 NICs
Build
First I installed CentOS on a 50GB logical volume and then created a second logical volume of 350GB mounted on /data. Next, I created another logical volume from the second drive and mounted that on /var/lib/elasticsearch ready to store all the indexes related to the packet captures. |
| Disk layout |
Once the disks are sorted, the next task is to install Java. The easiest way is to download the latest the Server JRE from Oracle. The one I used for this build was server-jre-8u131-linux-x64.tar.gz. To install and configure follow these few simple steps.
- Download the file and copy over to the target machine
- Create a directory to store the Server JRE
- mkdir /usr/java
- Untar and uncompress in the directory created above
- tar zxvf server-jre-8u131-linux-x64.tar.gz
- Add the following lines to the /etc/environment file
- export JAVA_HOME=/usr/java/jdk1.8.0_131
- export JRE_HOME=/usr/java/jdk1.8.0_131/jre
- Add a java.sh file to the /etc/profile.d directory with following in it
- export PATH=$PATH:/usr/java/jdk1.8.0_131/bin:/usr/java/jdk1.8.0_131/jre/bin
Once Java is installed it's time to install the Elasticsearch RPM. The recommended one for Moloch 0.18.2 release is Elasticsearch 5.2.2. Follow these steps to install Elasticsearch
- Edit the /etc/security/limits.conf file and add the following lines
- Reboot the server for the changes to take effect.
- Install the Elasticsearch rpm using yum
- yum install elasticsearch-5.2.2.rpm
- Adjust the amount of RAM allocated to JAVA.
- Add the -XX:+UseCompressedOops to the jvm.options file.
Start the service
- systemctl start elasticsearch
- yum install wget
- yum install moloch-0.18.2-1.x86_64.rpm
- /data/moloch/bin/Configure
/data/moloch/bin/Configure
Interface to monitor: eno33557248
Password to encrypt S2S and other things [no-default]: ************
Follow the rest of the steps to to initialise the Elasticsearch and create the first admin user
Initialise Elasticsearch with the following command:
- /data/moloch/db/db.pl http://localhost:9200 init
- /data/moloch/bin/moloch_add_user.sh admin "Admin User" ********* --admin
- vi /data/moloch/db/daily.sh
Schedule the daily.sh script to run during quiet hours using cron.
- crontab -e
If you want to change the percentage of disk space that should be available before PCAP files are deleted edit the /data/moloch/etc/config.ini file and set the value you want. The default is 5% and seems to work well for me.
Add a firewall rule to allow remote access to Moloch on 8005 port.
- firewall-cmd --zone=public --add-port=8005/tcp
- firewall-cmd --zone=public --permanent --add-port=8005/tcp
- systemctl start molochcapture.service
- systemctl start molochviewer.service


Comments
Post a Comment