Squid Proxy with SOF-ELK Part 1
In this post I wanted show how a Squid Proxy could be used with OpenDNS to provide a simple but effective security for home or small business. This blog post was inspired by the SANS course SEC530 Security Architecture & Engineering which leads to the GIAC Defensible Security Architecture (GDSA) certification. This is a great course for anyone looking to develop and improve their 'full stack' defensive posture. Monitoring is by courtesy of SOF-ELK, one of the many tools by those nice people at SANS. SOF-ELK is used in a few SANS course including FOR572 Advanced Network Forensics: Threat Hunting, Analysis, and Incident Response, and SEC555 SIEM with Tactical Analytics.
OpenDNS Enterprise is now Cisco Umbrella, however, the OpenDNS Home service is available for free and small businesses can use the Prosumer services for a modest fee.
The fist step is to install a CentOS 7 minimal and then apply the latest updates.
In order to use the OpenDNS Home service I installed the Bind9 DNS Server directly on the proxy server itself. This is not strictly necessary, you could use the OpenDNS service as a configured ‘Forwarder’ on any DNS server. For example if you have an Windows AD domain you could add it as the preferred forwarding servers as shown below.

However, allowing ONLY the proxy server to access the external DNS provider, in this case OpenDNS, means that hosts can’t resolve external addresses without going through the proxy. This might not be a practical solution as it means only proxy aware protocols can be used and you might need some exceptions to that. In any case the firewall must restrict the outbound communication to allow ONLY the proxy server to access the Internet for HTTP/HTTPS connections. If you need to use other protocols directly through the firewall then these destinations should be explicitly whitelisted and logged. Although it would be possible just to add the OpenDNS servers as the DNS servers in the Interface configuration (see nmtui image below) using the bind DNS server service means that I can add another forwarder configuration to the named.conf to resolve internal IP addresses using the Windows AD (or other) 'internal only' DNS server.

I also deploy DNS Sinkhole on this DNS server which can provide a useful extra capability to redirect specific domains or hosts to internal address. This can be used for incident response for containment as well as for detection. There is an excellent paper on DNS Sinkholes in the SANS reading room.
Install a Poxy Server
Open an ssh connection to the Proxy Server and install Squid using yum. Installing the Squid Proxy server software is simply a matter of type ‘yum install squid’.
That was easy, we’ll come back to do complete the config after installing DNS server software.
Install DNS Server
Once the proxy is installed we can add in Bind9 and the Bind utils for testing.
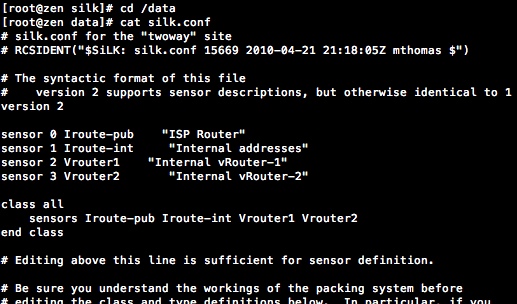
To configure the DNS server to forward for Internet name resolution to the OpenDNS servers I need to make an addition to the named.conf file as shown here.
The complete options section should look like this:
Use the network manager nmtui to configure the DNS server to be the localhost address as shown below.

Restart the named daemon
Now check that some sites resolve and that others return the block address 146.112.61.xxx dependent on the type of block.

Install SOF-ELK
To get SOF-ELK I download the VM from Phil Hagen’s Github. There are a couple of things I needed to do once it was downloaded. First I loaded up into VMware Fusion and edited the IP Settings so that I could deploy it to my vSphere ESXi host. The first setting is really just to make sure the Network Adapter setting will work after it’s on the ESXi server, simply change the VM settings to Bridged Networking and set autodetect then configure a manual address or DHCP as required. In next to no time I have a running SOF-ELK instance. One caveat is that I find that doing previous steps means I need to make a simple change to the Elasticsearch.yml file to get elastic to listen on both localhost and the adapter address else Logstash can’t connect to it.
All the configuration files for Logstash are linked to /etc/logstash/conf.d from /usr/local/sof-elk/configfiles following along with this methodology I added the following two files
Create the Squid ingest filter and output files in /usr/local/sof-elk/configfiles.
The logstash input filter (parser)
The output config
Then create the symbolic links as shown here.
The only other addition is the template file that can be seen referenced in the output config /usr/local/sof-elk/lib/elasticsearch-squid-template.json
Add in an allow rule on SOF-ELK for port 5044/TCP so that filebeat can send the log events to Logstash.
Configure Squid Logging
Squid needs to have the right level of logging enabled so that logstash can digest the log files that filebeat will send over. There should be a default custom logging option but if not add the two lines shown below to the /etc/squid/squid.conf file
Install Filebeat
Install Filebeat by following the directions at elastic.co then edit the /etc/filebeat/filebeat.yml config file to read the custom log file in squid as configured earlier.
Enable the filebeat service and restart. Check the process has started and if not check for syntax errors. YAML files require accurate indentation. Note that lines 17-19 are required so that the ‘type’ of log being sent can be identified and parsed by the correct filter.
Kibana
Hopefully at this point you can configure your browser to use the proxy server and end up with events in Kibana. Once all that configuration is complete, point your browser at the sof-elk on port 5601
Before you can check your index, go to the Management section in the navigation then select Index Patterns under Kibana and click create index pattern. Enter squid-* and click Next Step, select the timestamp field and complete the index creation.
If all has gone well, you should see data in the squid index as shown here.

Configure Squid Rules
Now let’s configure the rules in Squid to enable Ubuntu servers to get their updates without authentication and whitelist the destinations they can update from. Don’t forget to restart the Squid service after changing the config.
In the config above we instruct squid to allow our list of Ubuntu servers to connect to get updates via the proxy. This is a pattern that can be repeated for all types of servers and devices; CentOS and MS Windows servers as well as Windows workstations, It’s only going to allow unauthenticated access to whitelisted destinations - i.e. the corresponding update servers for the particular group of devices. For Ubuntu, we do this by adding proxy config to the apt configuration file /etc/apt/apt.conf.d/proxy.conf
However, the first time I tried an update there were a few repos that failed.

I added the missing domains.
This time all were successfully fetched. Note that the osquery repo is on an Amazon S3 bucket so no wildcard domain here, instead the full specific domain is used.

The final part is to setup authentication for Squid Proxy users and in this example we are just going to setup simple basic authentication. There are a number of supported authentication patterns for Squid that allow it to be integrated with a variety of authentication providers like LDAP and Active Directory.
Once the squid service is restarted I created a few user accounts as shown below.
Each user has a password configured and when Squid detects an unauthenticated access outside of any of whitelisted server destinations it will prompt for credentials. After a user authenticates they can surf the web. If they encounter an OpenDNS blocked site they will receive a OpenDNS Block page as shown below.

Configure OpenDNS Home
The OpenDNS Home service is extremely flexible allowing for selection of blocked categories such as shopping and gambling. Specific sites can be allowed even though the category is blocked, see the the example below where the category Gambling is blocked but UK National Lottery is permitted. You can also block specific sites that might not be included in a blocked category, in the example below I have blocked the Create and Craft site.

Configure Kibana
As previously mentioned there are a number of different Block addresses that are used by OpenDNS.
- Domain List Block Page
- Command and Control Callback Block Page
- Content Category Block Page
- Malware Block Page
- Phishing Block Page
- Suspicious Response Block Page
- Security Integrations Block Page
Wouldn’t it be nice to have Kibana show us the actual reason rather than the block IP address? We can do that. Select Management from the left hand-side navigation in Kibana then click on Index Patterns under Kibana. Select the squid-* index then click on the Scripted fields tab. Click the Add scripted field button and enter the OpenDNSBlockType. Complete the entry as shown below. The order of Block Type is the same as the list above.


Scripted fields can’t be used for filtering but that does not matter so much as at least we can display the reason for the block in a way that analysts can use the information and we can filter based on the IP addresses in the Forwarded_to field.

Once we have that we can use the label in Visualisations in Kibana.

Security Analysts can examine the block type by user.
Conclusion
In this post I wanted to establish Squid proxy and OpenDNS content filtering as the controls, and show how to use the rules in squid to allow specific hosts whitelisted unauthenticated access for software and patches as well as giving users authenticated access to sites that they are allowed to access by OpenDNS. We have established SOF-ELK as a tool for comprehensive monitoring of both of those control elements. Finally I added a scripted field to make the data in SOF-ELK more readable.
Coming in Part 2 - Analysis
That concludes the initial setup and configuration. In the next instalment I want to examine how we can use some of the rich data from Squid in SOF-ELK to do some analysis in our SOC.

Comments
Post a Comment